Bearing that in mind, the bearings on the cart tires should get a periodic spritz of aerosol silicone. You don’t have to take anything apart to get to the bearings, as you would do on an automobile. All you have to do is spray onto the hub around the axle and give the tire a spin to work the dry lubricant into the bearing raceway. To get to the bearings on the side of the tire towards the cart, you’ll have to remove the tire. But that’s easy. Just pull the hitch pin clip that holds the tire on to the axle shaft and the tire slides right off. Nothing could be easier.
The only other item of regular maintenance is to periodically paint on a fresh coat of protective stain. If you use your cart a lot, and leave it out in the elements all year long, as I have done with mine, it will get dowdy looking and develop some surface cracks in the plywood. Re-staining will make it look like new and help to seal the cracks.
My original Whizbang Garden Cart is now going into its fourth season of hard use here on my homestead. I recently re-stained it and took a couple of pictures. Here’s the first...

In the above picture I have removed the cart’s tires and the metal corner guard on the dump-front end. I also removed the metal J-Bead, which was never properly secured (as I show in this blog essay). Then I used an orbital sander with a sheet of 80-grit paper to quickly sand over the flat surfaces of the cart. I didn’t sand it down to bare wood. I just sanded to level and clean the surface. It’s a simple thing to do.
Finally, I balanced the cart on a plastic pail in the yard and brushed on the stain. That gallon can you see in the picture is the same can of stain that I used when I first made the cart. This fourth coat just about emptied the can. In my plan book, I recommend that you purchase a gallon of good-quality stain and save it for future re-stainings. The lid on my can of stain got ruined last year so I wrapped the whole can in plastic wrap and it kept just fine. Here’s the restained cart...
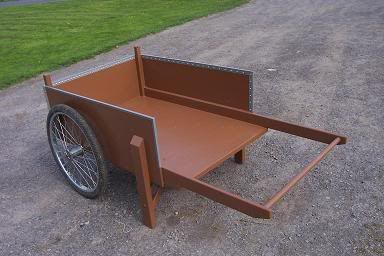
Now that’s a beautiful specimen of a Whizbang Garden Cart, if I don’t say so myself. You’ll notice that I have properly affixed a new length of metal J-bead over the plywood edges. The cart is going into its fourth season of use and abuse and it not only looks like new, it still works like new. By the way, even though it has been out in the rain and snow, and has been used to haul soggy wet materials for the past years, and is a little beat up (if you could look more closely, you would see come minor dents and chips), the cart shown absolutley no sign of wood decay. That’s a Whizbang cart for you!! Here’s another view…..

To find out more about the Whizbang Garden Cart and learn how to get a copy of my plan book, check out this link.

No comments:
Post a Comment