The edge I recommend you use is galvanized metal drywall J-Bead which is commonly available in most any lumberyard and is very inexpensive. If you are familiar with J-bead you may be thinking to yourself:” That stuff is kind of lightweight, isn’t it?”
Yes it is. But when you have glued and screwed it over the edge of ½” plywood (which it happens to fit over perfectly) the metal protects the wood from moisture penetration and provides surprising durability to the edge. So, by itself, the J-Bead is flimsy, but once secured to the plywood, it is not.
As I said, the J-Bead is glued and screwed over the plywood edges. This is done after you have cut the plywood pieces to size, then marked and drilled holes for every screw, as is clearly explained in my book. The glue I strongly recommend is polyurethane glue. I strongly recommend it because it is waterproof glue. A common brand of polyurethane glue is Gorilla Glue. You’ll find Gorilla Glue in any Home Depot or Lowes home center.
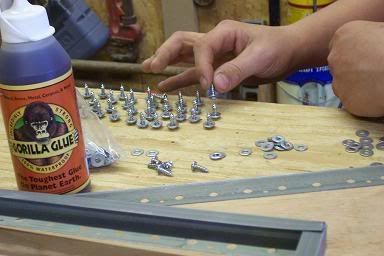
The above picture shows a piece of metal J-Bead, attachment screws, and Gorilla Glue.
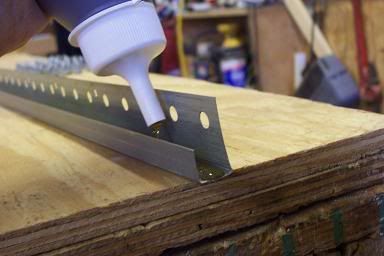
This picture shows the Gorilla Glue being applied to the J-Bead prior to putting it on the plywood edge. Just squeeze a bead of the maple-syrup-consistency adhesive along the bottom of the channel.
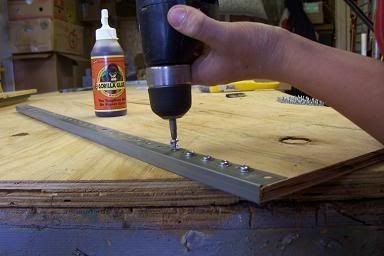
In the above photo my son James is driving screws into the J-Bead. The J-Bead has ¼” diameter holes punched 1” apart along the one edge. That edge is positioned on the inside of the cart. The J-Bead is then pushed down tight to the plywood. On the cart sides, one screw with a washer under its head is driven in every other hole (2” apart). On the dump-end panel, a screw and washer is driven into every hole (1” apart). James is putting screws into the dump end panel in this picture.
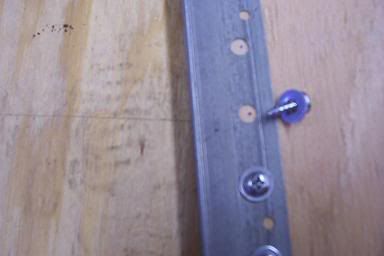
The picture above shows the placement of the screws in the holes. Each screw is driven just below the center of the hole. This placement assures that the screw holds the J-Bead down just right. If you drove the screws too low, they would deform the metal. If you drove them too high, they would wedge the metal edge away from the plywood. So, just below the center is where they go and it isn’t a hard thing to do. My son is twelve and he did this task just fine.

One of the distinctive attributes of Gorilla Glue is that it swells when it is curing. It will swell out from under the edges of the J-Bead. Then it dries to a hard, foam-like consistency which you will have to clean off. In the picture above I have stacked the two cart sides and the dump-end panel on paint cans to cure. You’ll see why in the next picture
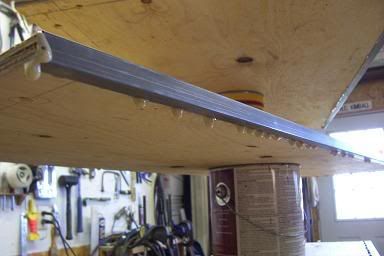
As you can see in this picture, the glue does, indeed, swell out from under the J-Bead. If the cart sides were laid aside in a vertical position (instead of horizontal on the paint cans) the glue ooze would run down the plywood faces and cleaning it off would be harder. So that’s why you need to stack the sides on the cans.
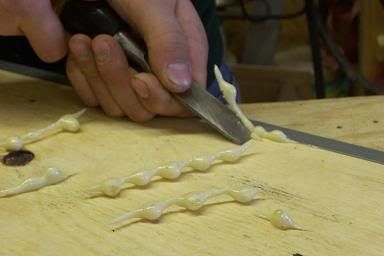
A sharp chisel makes short work of cleaning the dried glue ooze-out off as James is showing in the above picture.
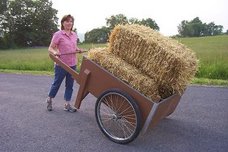
As you can see, putting the protective metal edge on the cart sides is a simple process. It so happens that building the whole Whizbang Garden Cart is a simple process, especially when you take it one logical step at a time. My plan book, Anyone Can Build A Whizbang Garden Cart provides you with a simple, logical, one-step-at-a-time instructions.
And once you've made your own Whizbang Garden Cart, you can enter it in the Whizbang Garden Cart Contest, as explained here.
No comments:
Post a Comment