Sunday, June 3, 2007

The Whizbang Garden Cart Poultry Brooder

Photo Sharing and Video Hosting at Photobucket

We recently bought a dozen day-old turkey chicks. I set up a simple temporary brooder for them inside my workshop using one of my Whizbang Garden Carts. The picture above pretty much tells the story (note the curious chicken that has come into the shop).

I layered some plastic in the bottom of the cart, dumped in some wood shavings, rigged up a heat lamp, added some food and water, and the chicks were safe and comfortable. Such a brooder is only good for a week or so before the birds start jumping out. But it was an easy way to get them off to a good start.

This next picture shows the plywood board I made to block off the open end of the cart. The plywood is notched to fit around the handles. A piece of pine board screwed to each end serves as a place to put a spring clamp and hold the board in place. Then a couple of spring clamps at the bottom, over the handle, hold the bottom in place. Since the cart is in my shop, there was no need to put a protective wire top over the cart, but that could have been done easily enough.

Photo Sharing and Video Hosting at Photobucket

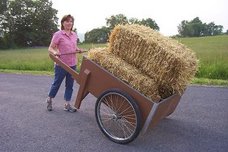
So, as you can see, the Whizbang Garden Cart isn’t just a hauler. You can even use it to get your poultry flock off to a good start.

To learn more about the homemade Whizbang Garden Cart and find out how you can get plans to build your own cart CLICK HERE

The Whizbang Garden Cart Portable Work Table

If you drive by my house, and look carefully, you will notice that two sides are nicely sided with cedar shakes. But part of the back and one side has tar paper on it. That’s the way it is when you build your house yourself, and you aren’t flush with money, and you have an aversion to borrowing. Which brings me to the following picture:

Photo Sharing and Video Hosting at Photobucket

That’s a view that you won’t see driving by the front. Not pretty. But give me time. It’ll all come together in time. I plan to put a patio of paver brick off the back door. And maybe even a pergola over the patio. With grape vines growing over it. And, of course, I’ll finish the cedar siding.

Last week, however, I took time off from work to do other things on the house that needed doing. Specifically, I needed to remodel a bedroom upstairs. My three boys have been in the bedroom for 16 years. Marlene and I had the other bedroom in our house. We decided to switch bedrooms. They get ours (because it is bigger) and we get theirs. As you might imagine, after 16 years of boys living in the bedroom, it was in rough shape. I had to patch the drywall, skim coat the walls & ceiling, replace the window, put in a new door, put in all new trim, do some rewiring, paint, and wallpaper.

It was a lot of work but it is done now and Marlene couldn’t be more pleased. I did it all for her. After all, I sure didn’t need a new bedroom. I could sleep in a sleeping bag on an old mattress on the floor and be satisfied with that. But women aren’t like that. They like a real pretty bedroom. So that’s what we got.

Well, anyway, the picture shows how I made a handy work surface for my chop saw and portable table saw, and assorted tools. I simply laid a partial sheet of plywood over the top of my Whizbang cart. The work surface is about 30” high which is perfectly suited to a work surface.

I put the plywood on at my workshop, loaded the tools on the work surface and inside the cart, then wheeled it all to where I wanted it. When I was done with work every night, I threw a plastic tarp over the whole thing and secured it with spring clamps on to the plywood. When the project was all done, I wheeled it back to my shop and unloaded everything.

So there you have an inexpensive, low-tech, and highly effective portavle work surface! And there you have an exceptionally handy cart!

=====================

To learn more about the homemade Whizbang Garden Cart and find out how you can get plans to build your own cart CLICK HERE